


Picture this: You have dreamed of building your own app, but you don’t have any coding experience or haven’t gone through formal engineering training.
Today, this is not a pipe dream. Without understanding much about software development, you can still build a simple app with the assistance of AI tools, like OpenAI’s GPT, Google AI Studio, or Cursor.
Even when you’re an experienced developer who is looking for ways to ease coding work, AI can help you code with vibes. Just type natural language prompts, and let AI generate functional code within minutes.
However, AI is not omniscient. Its generated code may contain security flaws, logic issues, or inefficiencies. To avoid headaches and waste of time, you need to know how to start vibe coding effectively.
This blog post will walk you through each crucial step of vibe coding to make it an exciting experience instead of a pain! Whether you’re a novice or skilled developer, this guide is for you. Keep reading and practice vibe coding!
Mental Preparation Before Starting Vibe Coding
Vibe coding is not as easy as its name shows. It can drive you mad if you don’t get your mindset right before diving into true vibe coding.
When vibe coding, don’t set the goal of developing polished, production-ready code. Instead, you should focus on building something simple but working, typically a Minimum Viable Product (MVP). This version comes with enough features to prove the feasibility of your idea.
Although vibe coding tools don’t excel at building production-ready software, they’re still capable of handling an MVP. Therefore, don’t ask AI to generate clean code, rename variables, or fix structure in the early phase of software development; instead, you should give the AI enough guidance to ensure your feature runs as expected.
Remember to prioritize seeing your idea in action rather than making it elegant.
Once you’ve developed a functional version and your idea proves feasible, you can go back and refine your code later.
With this mindset, you can make full use of vibe coding, keeping your creativity flowing and avoiding getting stuck in trying to make everything perfect from the first try.
Even when you want to build something working, it doesn’t mean vibe coding fits well in every case. Therefore, you need to clarify scenarios to vibe code effectively.
When to vibe code
Vibe coding is the best option for:
- Personal Projects: If you want to build something for personal demands, vibe coding is a good choice. You don’t need to pay a huge sum to hire a professional developer, but still generate the codebase with AI’s assistance.
- Prototyping: Vibe coding is ideal if you want fast prototyping to test your idea instead of building an entire application right away. With AI, you can validate the feasibility of a concept before turning it into a production-ready solution.
- Hackathons: These events often require participants to get their ideas running quickly in a short term (24 – 48 hours) rather than perform every coding step. Vibe coding can help you go through these events easily.
- Learning New Technologies: AI helps you learn new programming languages or frameworks by exploring practical syntax and patterns. No more boring theories!
When not to vibe code
Don’t use vibe coding for:
- Production-Ready Projects: Vibe coding encourages people to program without the need to understand. This turns AI-generated code into a nightmare in production-ready projects, as the code is not always accurate. Meanwhile, code for real software must be reliable, secure, and maintainable.
- Team Projects: In collaborative environments, other team members need to read, expand, and maintain your coding work. Therefore, transparent and consistent code is a must. However, as AI-generated code may hide systemic issues, a lack of human reviews can lead to technical debt and even ruin the whole development work.
- Critical Security Functions: AI tools are not designed to build secure apps by default. Meanwhile, factors like authentication, user data, or payments require peer reviews and strict standards. If you rely heavily on vibe coding, you’ll risk creating insecure features.
Step-by-Step Guide to Start Vibe Coding for Developers
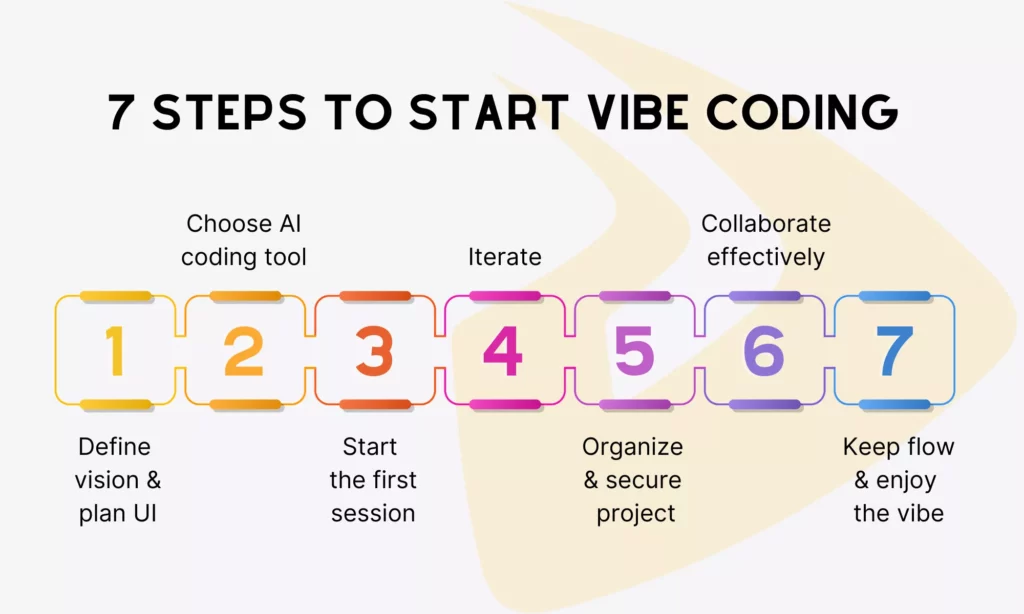
Once you have the right mindset and identify the right scenario to use vibe coding, let’s develop your dream app with vibes. Below are detailed steps you should follow to start vibe coding effectively:
Step 1: Define Your Vision and Plan the UI
The first step of vibe coding is not… coding, but clarifying what you want to develop and how it should work. Even when vibe coding doesn’t require you to understand the codebase, don’t program blindly. Instead, you should define your goals and direction clearly to avoid getting stuck.
Ask yourself some of the following questions to identify your vision:
- What is the main purpose of your project?
- Which features must be included and excluded in the first version?
- What should end-users see and do in your potential app?
Once you’ve clarified your vision, it’s time to put advanced AI tools like GPT-5 Pro or Gemini 2.5 Pro to work. These platforms are seriously effective for brainstorming – think feature planning, mapping user journeys, and connecting all the moving parts of your product without going in circles.
When it comes to designing the UI, streamline your process with platforms like v0 or 21st.dev. They let you experiment with layouts and components early on, so you can quickly test different structures and land on something that aligns with your goals – without wasting time later on endless redesigns.
And a quick recommendation: if your project is aiming for more than just the basics, it’s smart to prep foundational components – buttons, cards, loaders, you know the drill. Having these ready to go speeds up development and keeps your code organized as you expand your product. Efficiency now saves you headaches down the line.
Pro tips: Remember “garbage in, garbage out.” How clear your prompts are significantly affects the quality of your output. No matter which AI coding assistants you work with, it’s essential to give them specific instructions to create better logic and UI layouts.
Step 2: Choose Your AI Coding Tool
You already have clear ideas and the UI layout. Now, let’s choose an AI-powered coding tool that fits your workflow and technical level.
There are various AI coding platforms to choose from. Choose one that makes you want to collaborate with comfort instead of just delivering commands with frustration. Below are several options to begin with:
- Replit is ideal for quick experimentation, browser-based coding, lightweight projects, or unexpected inspiration. With some simple setup steps, you can start coding immediately, thanks to the help of its built-in Ghostwriter AI. The AI function, accordingly, creates and debugs code in real time, removing coding hassles.
- Cursor is like VS Code with AI capabilities. Its AI chatbot integrated into your editor can answer your questions instantly, improve your code, or create new features. Cursor is a good option for larger projects that require structure and scalability.
Regardless of your choice, you should find a coding environment where you can have a conversational talk with your AI assistant instead of just typing commands.
So, do you already have the right IDE? Good, let’s sign in and initiate your first project. Don’t rush into something too complicated; instead, start with something simple, like an HTML/CSS site, a Python script, or a JavaScript application.
If you choose Cursor, you should install your OpenAI API key or Gemini key so that the AI assistant can understand and generate code properly.
Step 3: Start Your First Vibe Coding Session
Everything is ready? So, let’s start your first vibe coding session by telling the AI what you want in everyday language.
To do so, open the chat panel inside your chosen tool first. Then, describe your idea in detail, and there’s no need to worry about perfect syntax or function names because the AI will handle technical things.
For example, you can prompt the AI to:
“Build a landing page with a white background, a centered heading that says ‘Vibe coding’, and a signup button that changes color when hovered.”
The AI understands the intent of your prompt. It creates code or adjusts your attached files accordingly.
Most AI IDEs offer a diff view, so you can observe the changes it made line by line. Spend some time reviewing the code or changes, and click Accept Changes if everything looks fine.
Step 4: Iterate – Describe, Generate, Test, Refine
Vibe coding involves a short loop, from describing your ideas and generating code to testing and refining the output.
The AI may not produce the right results on the first try. So, you should work side-by-side with the AI assistant or send it the necessary follow-up prompts to improve the code until it works as intended.
After the AI creates code, you should run the code instantly to see how it works. Don’t wait until you’ve developed everything. Early testing helps you catch issues and understand what’s happening under the hood.
If something unexpected or error messages appear, simply copy and paste the issues into your chat and require the AI to fix them. As AI coding tools are trained to read and understand common errors effectively, they’ll suggest suitable solutions.
Besides, you can ask AI to add new features and improve your existing project to make it more polished. For instance, you can tell AI to “make the web page responsive on mobile devices” or “add a shopping cart.”
By following the short loop (Describe → Generate → Test → Refine), you’ll get a more polished code.
Pro tips: When your chat is too long and the AI starts to lose track of what you’re building, don’t panic. Open a new chat and summarize your project context briefly before continuing the development work.
Step 5: Organize and Secure Your Project
When you successfully build something functional, you should keep your project organized and secure to avoid confusion or security issues later.
You should start organizing your files and folders logically by grouping related assets, components, and scripts. Then, use tools like GitHub or GitLab to set up version control, track changes, and return to older versions if something breaks.
Next, it’s crucial to protect your project’s sensitive data. Don’t insert API keys, tokens, or passwords directly into your code. Instead, keep them in an .env file or leverage secure environment variables that your chosen AI platform supports.
You don’t need too-complex or enterprise-level security for a personal project. Just basic security practices are sufficient to keep your project safe.
Step 6: Collaborate with AI Effectively
When working with AI, you soon realize it’s not a rigid machine. Instead, it’s a collaborative partner who needs clear context and direction to deliver the best results. To make full use of your AI assistant, you should:
- Give the AI detailed prompts to clarify what you expect or what’s wrong with your code. For example, don’t say “fix my code,” but tell the AI that “this function doesn’t return the right value. Please optimize it for better performance.”
- Separate different tasks into focused conversations, like one chat for backend logic and another for UI updates. This keeps the AI consistent for specific tasks and avoids context confusion.
- Ask the AI to explain what it created, whether a feature or a bug fix. Understanding the reasons behind its generated code helps you control your project better.
Step 7: Keep the Flow and Enjoy the Vibe
Last but not least, coding with vibes, and don’t pressure yourself to build something perfect.
When you feel inspired, follow that spark and let the AI bring your idea to life. If you get stuck, take a short break, ask the AI about the issues you’re encountering, and adjust your prompt to fine-tune the code.
Vibe coding is associated with keeping creativity flowing freely instead of building real products. So, have fun experimenting, whether you want to learn a new framework, test your creative idea, or prototype a new app.
Vibe Coding Examples for Beginners

To understand how to start vibe coding better, let’s learn about an example project implemented through chats with AI.
Let’s say you want to develop a simple to-do list app where you can add, complete, and delete your daily tasks.
Prompt 1: “Create a simple to-do list web app using HTML, CSS, and JavaScript. Include an input field for new tasks, an ‘Add’ button, and a section below that displays the task list.”
How AI works: The AI uses JavaScript to create a basic webpage with a form input, a button, and a section that lists tasks dynamically.
Test/Review: The app works, which means you can type and add a task to the list. But as there’s no data storage yet, all your tasks will disappear when you reload the page.
Prompt 2: “Save tasks in the browser’s localStorage so they remain after refreshing. Add a ‘Clear All’ button to delete every task at once.”
How AI works: The AI updates the JavaScript logic to store tasks in localStorage and adds a “Clear All” button to remove all saved tasks.
Test/Review: Clearing tasks works. Besides, when you add a task and refresh the page, the task is still there. But the web app still looks plain and doesn’t state which tasks are complete.
Prompt 3: “Add a checkbox next to each task. When a task is checked, mark it as completed with a strikethrough style and save that state in localStorage.”
How AI works: The AI adjusts the task rendering logic to include checkboxes. Further, it also updates the stored data to remember which tasks are done.
Test/Review: Now, you can check off completed tasks. And the app still remembers the completion status of each task even after being reloaded. But then you realize that the app hasn’t included a way to delete individual tasks.
Prompt 4: “Add a delete icon next to each task. When clicked, it should remove that specific task from the list and update localStorage.”
How AI works: The AI adds a small trash icon beside each task with the delete functionality using JavaScript.
Test/Review: Now, you can remove single tasks, and the app looks more usable. But its UI is still unappealing.
Prompt 5: “Style the to-do list with modern CSS. Use soft colors, rounded corners, and a centered layout. Make it responsive on mobile screens.”
How AI works: The AI adds a clean, minimal CSS layout to keep tasks neatly organized, gives buttons subtle hover effects, and makes everything adaptable on mobile.
Test/Review: The app now feels more polished. You can add, complete, and delete tasks on it.
Common Mistakes When Starting Vibe Coding
Vibe coding is fun and fast. Although nearly 75% of people feel satisfied with their vibe coding experience, this new development approach can turn into a terrible idea if developers are too comfortable with the flow.
Below are several mistakes that beginners often make when starting vibe coding. Keep reading to avoid repeating these mistakes when implementing your project:
1. Consider vibe coding in production
One of the most common mistakes is to use vibe coding outputs for production-ready applications. The code generated by AI without thorough reviews is not accurate and reliable enough for real products.
It works, but doesn’t follow clean architecture, security standards, and performance best practices. That’s why you should consider vibe coding as a prototype phase or creative sandbox instead of something for real production.
2. Send overly broad or unclear prompts
AI cannot know you inside out. So it hardly understands your true intent if you say something too vague or generic, like “develop a cool app” or “build a simple fitness tracker.” As a result, what the AI generates can be incomplete or out of your expectations.
Therefore, be specific in your prompts. Include sufficient requirements and core features so that the AI can understand clear goals and context, hence delivering better outputs.
3. Ignore testing
You send a prompt, and the AI generates the code. This process repeats without testing and refining. As a result, some AI-generated code may not work and affect the performance of the entire app.
Therefore, we advise you to test the code after each generation and make necessary adjustments to keep your code accurate and easy to debug.

4. Involve too many tasks in a single chat
AI tools may mix up earlier instructions or lose context if you put too many tasks in a single chat. That’s why you should separate different tasks into different chats to ensure the AI will perform these tasks seamlessly.
If the chats stretch, start a new session and summarize your project clearly so that the AI still understands the context and what it needs to do next to deliver expected results.
5. Try to make everything perfect too early
The main focus of vibe coding is to create something functional, not perfect. Additionally, vibe coding works in an iterative process (Describe → Generate → Test → Refine). If you try to polish or refactor the code too often, you’ll feel more stressed when vibe coding.
Therefore, prioritize building functionality first and make sure it runs as intended instead of trying to make it perfect. Once your prototype works well, you can fine-tune its structure and visuals later.
6. Ignore version control
You can ask the AI to refine its code many times, but what if its latest version breaks and you cannot roll back to previous versions? This case is not rare, so you should use Git or your AI IDE’s built-in version control to help you recover easily from mistakes.
7. Forget ethical and security issues
Even when you vibe code for a hobbyist or personal project (for fun), it’s crucial to consider ethical and security issues.
AI tools don’t follow strict security standards or development guidelines. Therefore, they can create code that contains copyrighted snippets or insecure patterns. This code can expose your entire project to risks of legal penalties or data stolen.
Therefore, even when programming with vibes, you should prompt your AI assistant properly to ensure it will not generate code with sensitive or unsafe sections. Further, you shouldn’t paste credential data directly into prompts. This keeps your experiments or prototyping with AI secure and ethical.
Tips to Get Better at Vibe Coding
Beyond avoiding those common mistakes, you can also adopt the following tips to start vibe coding seamlessly and improve your coding results.
Choose an AI-Friendly Tech Stack
AI tools are trained on multiple programming languages and frameworks. But they don’t excel at all of them.
Several popular technologies, like Python, React, Node.js, Flask, or Next.js, have a long development history with rich ecosystems, diverse documentation, and strong community support. Therefore, working with AI on these technologies is a safer decision to start vibe coding.
As these languages and frameworks are common, AI can predict patterns, produce syntax, and suggest best practices more precisely. This also means faster iterations, fewer errors, and cleaner code output.

Prepare AI Context and Resources
Treat AI as a collaborative partner in your team. Like onboarding new members, you have to prepare essential resources and clarify context so that your AI assistant can understand the project goal and direction.
This preparation requires you to create an /instructions folder in your workspace. The folder contains key resources, including markdown docs, UI components, example code snippets, and any reusable logic.
Further, you should prepare a “Common AI Mistakes” file to record all frequent errors AI makes, like styling inconsistencies or wrong imports.
Write Strong Prompts and Use AI Wisely
The more specific your prompts are, the better output AI may generate. For this reason, your prompts should clarify what logic to implement, which file to edit, or how the feature should behave – all depend on your coding purpose. You can also ask AI tools (like Gemini 2.5 Pro or GPT-5 Pro) to fine-tune your prompt.
Further, don’t send too generic or overly broad prompts like “build the entire to-do list app.” Instead, you should break your prompt into 3-5 smaller tasks. This helps you guide the AI more accurately, test the code after each generation more effectively, and spot issues more easily.
If the chat becomes too long or messy, start a new chat and summarize your project’s context before continuing to tell what the AI should do next.
Prepare a thorough feature list
Before you start vibe coding, outline a clear feature list. This helps you and the AI understand the project scope.
If you have no previous experience coding similar apps, ask the AI for help to modify the feature list. You can also write down each feature with short notes on why it is essential and how users will interact with it.
Conclusion
Vibe coding is mostly for fun, experimenting, and quick prototyping. Thanks to the development of AI tools, especially large language models, coding is now more accessible to even non-engineers. Meanwhile, many experienced developers consider AI a powerful assistant in software development.
Having said that, coding without understanding (aka ‘vibe coding’) is not always easy. Our blog post has given you a detailed guide to developing software with pleasure. Follow each step and enjoy the coding work.
But if you’re serious about the software development process and looking for a reliable partner, Designveloper is here to help!
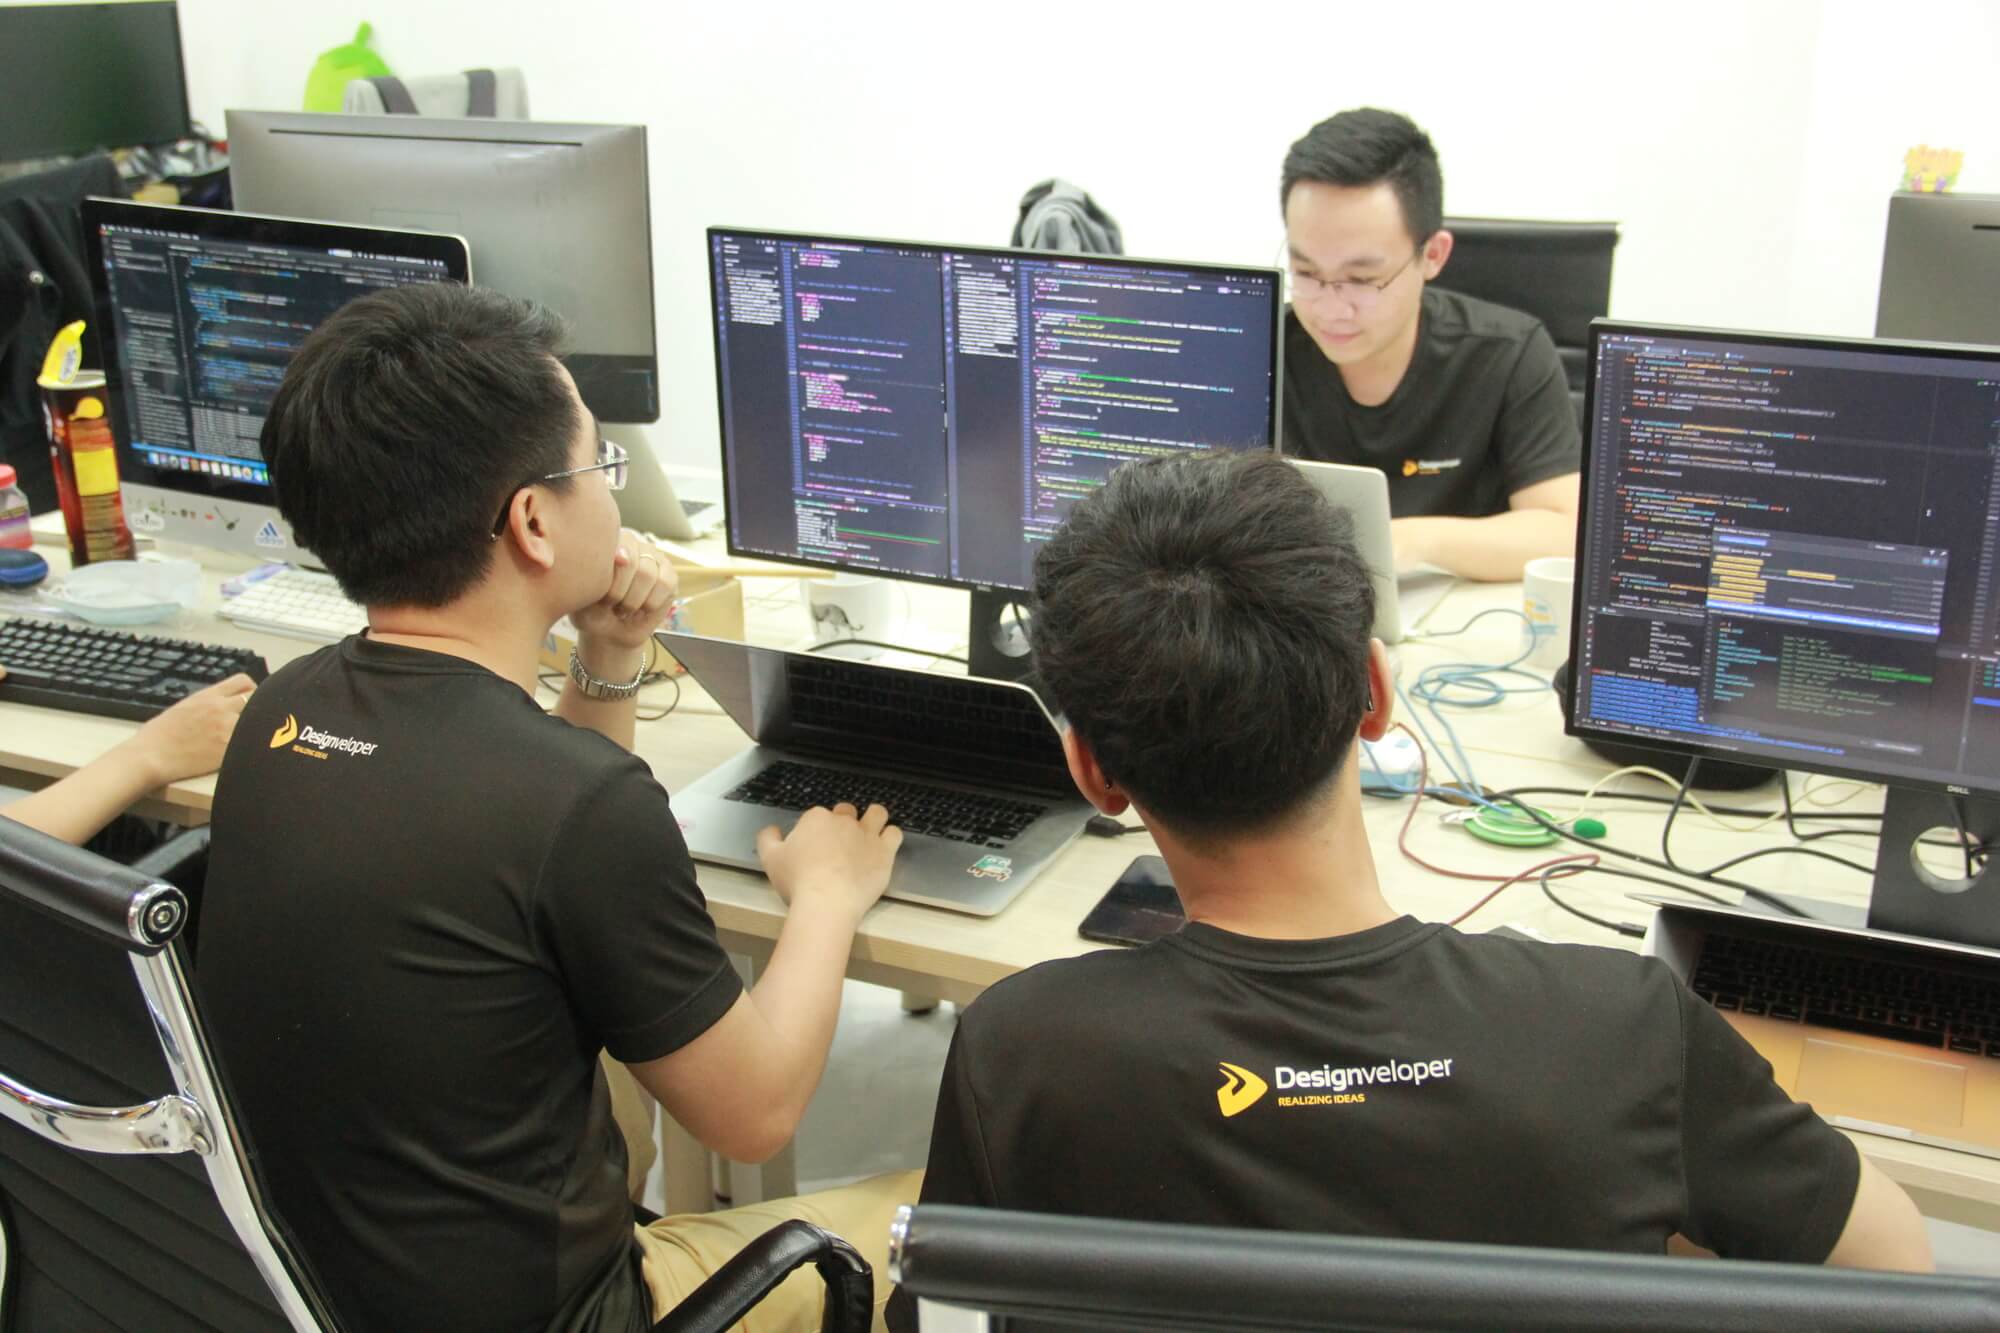
We’re the leading software development and IT consultancy company in Vietnam. Our team of 100+ skilled developers, designers, QA engineers, and other specialists has 12 years of experience in building websites, mobile apps, and custom products.
Our proven track record of 200+ solutions spans across sectors, from e-commerce and healthcare to finance and education. These solutions are of high quality and designed to scale with evolving demands. They help our clients increase productivity, boost organic traffic, and improve user experience.
For our projects, we choose the right stack of programming languages (Python, Swift, Kotlin, etc.), libraries/frameworks (React Native, Node.js, etc.), and emerging technologies (LangChain, OpenAI’s GPT, etc.). Our notable projects include ODC (a France-based healthcare platform), LuminPDF (an online document editor), Chloe Ting Hub (an e-commerce fitness platform), and Song Nhi (an AI-powered financial assistant for individuals).
With flexible Agile frameworks and active communication, we’re confident to deliver the best results for your business. Contact us now and bring your idea to life!
Also published on

Share post on


Read more topics


You may also like
Agentic AI Impact on Workforce: How It Reshapes Jobs & Organizations
Agentic AI Impact on Workforce: How It Reshapes Jobs & Organizations Published March 06, 2026
Agentic AI Single vs Multi-Agent Systems: Key Differences
Agentic AI Single vs Multi-Agent Systems: Key Differences Published March 04, 2026
Agentic AI Security: Risks, Core Architecture, Solutions
Agentic AI Security: Risks, Core Architecture, Solutions Published March 03, 2026