


How to Build Agentic AI: Practical Guide with Examples
Building agentic AI starts with business clarity, not code. A good agent does one job well, uses tools with limits, and stops at the right time. This guide explains how to build agentic ai in a practical way for non developers, such as startup founders, operators, and business owners. You will learn a simple flow you can reuse across use cases, from customer support to research to internal ops.
Momentum looks real, but risk also looks real. McKinsey reports that 62% of respondents say their organizations are at least experimenting with AI agents, so teams want to move fast. At the same time, Gartner warns that over 40% of agentic AI projects will be canceled by the end of 2027, so teams also need focus and control. That is why this article stays practical, step based, and outcome driven.

Step 1: Define the Agent’s Purpose, Scope, and Level of Autonomy

Start with a narrow purpose as the first step on how to build agentic ai. This choice decides most of the outcome. A vague goal creates vague actions. A sharp goal creates a predictable agent.
Pick one real business problem. Choose a problem that wastes time every week. Also choose a problem with a clear finish line. For example, “summarize customer complaint themes from the last 7 days” works. “Improve customer support” does not work.
Define the output like a product spec. Write the output format in plain words. Then write a sample output that looks acceptable. This step reduces debate later.
- Output type: text, email draft, ticket update, spreadsheet rows, or a short report.
- Output length: short, medium, or long.
- Output quality bar: what counts as correct, and what counts as unsafe.
Decide the autonomy level early. Many teams skip this and regret it. Autonomy means whether the agent only suggests actions, or it can act in systems.
- Suggest mode: the agent drafts, ranks, and recommends. A human clicks approve.
- Act mode: the agent calls tools that change data, send messages, or trigger workflows.
Add human approval where risk is real. Use humans for money, compliance, and external communication. Keep automation for low risk steps, like drafting and internal routing.
Define stop rules. An agent needs a clear stop. Without it, the agent can loop, overthink, or keep searching. Decide when it must stop, even if the answer feels incomplete.
- Stop on confidence: the agent has enough evidence to answer.
- Stop on limits: time limit, cost limit, or step limit triggers a stop.
- Stop on uncertainty: the agent asks a human when it cannot verify key facts.
Limit the scope to prevent tool chaos. Keep the first version small. Do not let the agent handle every edge case. Instead, define what it will not do. This choice makes testing possible.
Deliverable for this step: an agent charter. Treat this as the contract between business and build team. Keep it on one page so everyone reads it.
- Goal: one sentence.
- Users: who triggers it, who approves it.
- Inputs: what data it can read.
- Outputs: exact format and destination.
- Autonomy: suggest or act.
- Guardrails: what it must never do.
- Stop rules: step, cost, and time limits.
Step 2: Choose the Right LLM and Agent Framework

Choose the stack that you can operate, not the stack that sounds advanced. Most early failures come from complexity, not model quality.
Understand what the LLM does in an agent is crucial in knowing how to build agentic ai. In an agentic system, the LLM does more than write text. It also plans, chooses tools, and judges results. So you need a model that follows instructions well, stays stable, and supports tool use.
Pick an LLM based on your constraints. Start with practical constraints, then choose the model.
- Cost: estimate how many runs per day you will do.
- Latency: decide what response time users accept.
- Context window: decide how much information the agent needs at once.
- Tool calling support: ensure the model can request tools in a structured way.
Do not confuse framework with intelligence. A framework orchestrates steps, state, and retries. It does not make the model smarter. Still, a framework saves time when you need loops, approvals, or multi step flows.
Use a simple rule for choosing a framework. Start simple, then add structure only when you feel pain.
- Start simple: one agent, one loop, a few tools.
- Debug first: choose a setup that shows tool calls and outputs clearly.
- Scale later: add graphs, teams of agents, and memory when you can measure value.
Common options, in plain terms. LangChain helps connect models and tools quickly. LangGraph helps when you need loops and state. CrewAI helps coordinate multiple agents with roles. LangGraph describes itself as a low level orchestration framework and runtime for building, managing, and deploying long running, stateful agents, which fits many agent workflows once you outgrow simple chains.
Business friendly stack examples. A founder can use these as starting points.
- Internal research agent: LLM plus search tool plus a simple loop.
- Support drafting agent: LLM plus ticket system tool plus approval step.
- Ops routing agent: LLM plus database read tool plus rule based routing.
Step 3: Design Agent Behavior and Decision Logic

An agent differs from a chatbot because it decides what to do next. So you must design behavior, not only prompts. Behavior design makes the agent predictable.
Define the decision points. A practical guide on how to build agentic ai repeatedly faces the same questions.
- Should I act now or ask a question?
- Which tool should I use?
- Did the tool result solve the task?
- Should I retry, escalate, or stop?
Write explicit rules before you write prompts. Rules force clarity. Prompts then carry the rules into the model. This order reduces surprises.
- Ask rules: when the agent must ask for missing inputs.
- Act rules: what conditions allow a tool call.
- Retry rules: how many retries, and how to change the approach.
- Stop rules: when the agent must stop and return what it has.
Prefer deterministic behavior early. Creativity helps ideation, but it hurts reliability. So start with stable outputs. Then expand once you trust the system.
- Use fixed formats: templates, bullet lists, and short sections.
- Use stable settings: lower randomness for decision steps.
- Use constrained choices: choose from a short list of allowed actions.
Build the Reason, Act, Observe loop into the logic. Reason chooses the next step. Act uses a tool. Observe checks results. Then the agent adjusts. This loop creates autonomy without chaos.
Example behavior design for a pricing quote agent. The agent asks for missing requirements first. Then it checks a pricing table tool. Next it drafts a quote email. Finally it asks a human to approve before sending.
Step 4: Equip the Agent with Tools Safely

Tools give the agent hands. Tools also create risk. So you must design safe tool use as a core feature, not an add on.
Start with a small tool set. Each tool increases the action space. More action space increases mistakes. Begin with the minimum tools needed for the first use case.
- Read tools: search, database reads, CRM lookups.
- Compute tools: calculators, validators, formatters.
- Write tools: ticket updates, emails, record creation.
Define clear tool boundaries. Each tool should have a narrow purpose. It should also accept limited inputs. This design reduces harmful actions.
- Limit parameters: only allow fields you need.
- Validate inputs: reject unsafe or malformed requests.
- Sanitize outputs: remove sensitive data before the model sees it.
Use least privilege access. Give the agent read access before write access. If you need write access, narrow it to one system and one scope. This is the safest path for early agents.
Log every tool call. Logs help you debug and audit. They also help you spot abuse patterns.
Follow a standard tool calling flow. OpenAI describes how tools work in practice, including that the tool calling flow has five high level steps, which helps teams map responsibilities between the model and the application. Your application should execute tools, not the model. Your application should also enforce limits.
Practical safety controls that non developers can demand. Ask your build team to add these by default.
- Allow list actions: only approved tool actions can run.
- Approval gates: humans approve risky actions.
- Rate limits: stop tool spam and runaway loops.
- Cost limits: stop expensive retries early.
- Secrets handling: never expose API keys to the model.
Step 5: Add Memory and State When Needed

Not every agent needs memory. Memory adds value only when the task spans many steps or many sessions. Memory also adds privacy and governance work. So add it on purpose.
Separate state from memory. This step in the guide of how to build agentic ai helps keep designs clean.
- Short term context: the current task state, such as what the user asked, what tools returned, and what the agent plans next.
- Long term memory: durable knowledge across sessions, such as preferences, past decisions, and learned facts.
Add state for any multi step task. State helps the agent avoid repeating work. It also makes debugging easier because you can inspect what happened at each step.
Add long term memory only for clear reasons. These reasons usually justify it.
- Long running workflows: tasks that take hours or days.
- Personalization: the agent adapts to a user or account.
- Ongoing projects: the agent tracks progress across sessions.
Keep memory minimal and structured. Save short items, not long transcripts. Save facts, not raw conversations. Then retrieve only what the agent needs for the current task.
Define what the agent must forget. Treat forgetting as a requirement. For example, you can forbid storing sensitive personal data. You can also set retention windows for business safety.
Example memory policy for a sales support agent. Store product rules and approved pricing bands. Store account level notes that a human approved. Do not store payment data, identity documents, or private messages.
Step 6: Implement the Planning and Reasoning Loop

The loop makes an agent feel autonomous and is important to know in regards to how to build agentic ai. Without a loop, you just have a tool assisted chatbot. With a loop, the system can plan, act, observe results, and adjust.
Use one loop pattern for the first version. Too many patterns create confusion. These are practical choices.
- ReAct loop: the agent reasons, acts with a tool, then observes. This fits research, support, and routing.
- Plan then execute: the agent writes a short plan, then executes steps. This fits complex ops tasks.
- Reflect then revise: the agent drafts an output, then critiques it. This fits writing and fact checking.
Define what the agent observes. Observation is not only tool output. Observation also includes whether output meets a format, whether facts look verified, and whether the task goal is reached.
Prevent over reasoning early. Over reasoning wastes tokens and time. It can also increase hallucination risk because the model keeps talking. These controls help.
- Step limit: stop after a fixed number of loop turns.
- Evidence requirement: require citations or tool outputs for factual claims.
- Retry strategy: change the query or tool input, not only repeat the same call.
Common failures and how to avoid them. These issues show up in real deployments.
- Infinite loops: add step counters and hard stops.
- Tool misuse: add tool specific validators and allow lists.
- Unclear success: define a success check function that returns true or false.
Example loop for an invoice triage agent. The agent reads the invoice. Then it checks vendor data. Next it assigns a category. After that it drafts a short reason. Finally it asks finance to approve before it posts the update.
Step 7: Test, Debug, and Control Agent Behavior

Testing turns a clever demo into a reliable system. You cannot trust what you cannot measure. So build tests and controls as core features.
Test decision quality, not only text quality. Agents fail more often in decisions than in writing. So test the decisions directly.
- Tool choice: did the agent choose the correct tool.
- Timing: did it act too early, or ask too late.
- Stop behavior: did it stop when it should stop.
- Escalation: did it ask a human on risky cases.
Create a small test set with real examples. Use real tickets, real queries, and real documents. Then anonymize sensitive data. This makes tests reflect reality.
Use traces to debug the loop. Traces show each step, tool call, and output. They also reveal prompt leakage and hidden assumptions.
Add hard controls that protect budget and trust. Controls make the agent predictable. Predictability matters more than cleverness.
- Step limit: stop runaway loops.
- Cost limit: stop expensive tool calls.
- Fallback strategies: return a draft, request approval, or route to a human.
Plan for the biggest operational gap. Many teams lack skills to run and improve agents. IBM highlights that 42% cite inadequate generative AI expertise, so you should budget time for training and clear ownership.
Use governance signals from real surveys. Deloitte explains that Deloitte surveyed 3,235 leaders between August and September 2025, which shows that enterprise scale AI now depends on process, not only models. You can copy the same mindset in a startup. Define owners, reviews, and change logs.
Hands-On: Building a Simple Agentic AI in Practice

The fastest way to learn agentic thinking is to know how to build agentic ai, and build one. The goal is not perfection. The goal is a working loop you can inspect and improve.
The hands on example below follows a Research and Action agent pattern. It uses the loop Think → Search → Summarize → Fact check described in the attached guide :contentReference[oaicite:0]{index=0} and it explains each piece in non technical terms.
Project idea: The fact checking researcher. This agent takes a complex topic. It searches the web. It writes a summary. Then it critiques itself for accuracy. This pattern fits founders and operators because it saves research time while keeping control.
What you need, in plain language. You need a model API key and a search API key. The model writes and decides. The search tool brings fresh facts. Tavily provides a search API designed for agent workflows, and its docs say Build with Tavily, which is enough to understand the intent and setup at a high level.
Conceptual architecture. Think of the agent as a small team.
- Brain: the LLM that decides and writes.
- Hands: the tools that search and fetch data.
- Notebook: the state that stores what happened in the loop.
- Manager: the orchestration logic that decides what runs next.
Minimal working loop. Keep the first version very small. One tool is enough. One goal is enough. One loop is enough.
- Input: a user question that needs fresh facts.
- Decision: does the agent need search, or can it answer directly.
- Action: if it needs search, it calls the search tool.
- Observation: it reads results and decides if it needs more.
- Output: it writes a summary plus a quick self critique.
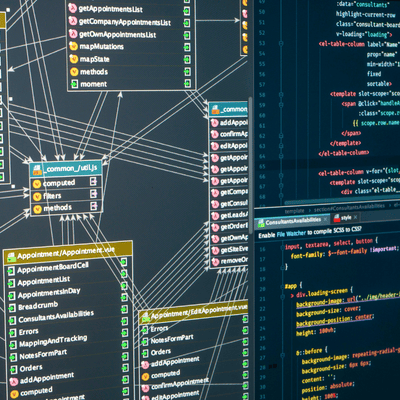
Simple implementation example in Python. A non developer does not need to memorize this code. Still, seeing it once helps you understand what your build team is doing, and how to build agentic ai. The steps below also show why LangGraph works well for loops because it models nodes and edges and can loop back after an action.
Step A: Define the Tools
First, we give our agent “hands” to search the internet.
Python from langchain_community.tools.tavily_search import TavilySearchResults # This tool allows the agent to search the live web search_tool = TavilySearchResults(k=3) tools = [search_tool]Step B: Set Up the “Brain” (The LLM)
We use a model that supports Function Calling.
Python from langchain_openai import ChatOpenAI llm = ChatOpenAI(model="gpt-4o", temperature=0) llm_with_tools = llm.bind_tools(tools)Step C: Define the Agentic Logic (The Graph)
In Agentic AI, we define Nodes (actions) and Edges (decisions).
Python from langgraph.prebuilt import ToolNode from langgraph.graph import StateGraph, END from typing import TypedDict, Annotated, List import operator # 1. Define the State (the agent's memory) class AgentState(TypedDict): messages: Annotated[List, operator.add] # 2. Define the Logic Node def call_model(state: AgentState): response = llm_with_tools.invoke(state["messages"]) return {"messages": [response]} # 3. Build the Graph workflow = StateGraph(AgentState) # Add Nodes workflow.add_node("agent", call_model) workflow.add_node("action", ToolNode(tools)) # Define Edges (The "Agentic" Loop) workflow.set_entry_point("agent") # Logic: If the model called a tool, go to "action". If not, END. def should_continue(state: AgentState): last_message = state["messages"][-1] if not last_message.tool_calls: return END return "action" workflow.add_conditional_edges("agent", should_continue) workflow.add_edge("action", "agent") # Loop back to brain after acting app = workflow.compile()Step D: Run the Agent
Now, let’s see the Agentic behavior in action.
Python input_message = {"messages": [("user", "What is the current status of the 2026 World Cup preparations?")]} for event in app.stream(input_message): for v in event.values(): print(v["messages"][-1].content)How to read the above, as a business owner. The graph has two nodes. One node thinks. The other node acts. A decision function checks if the model requested a tool. If it did, the system runs the tool. Then it loops back to the brain. If it did not, the system stops and returns the answer.
What makes this agentic, not a chatbot. A chatbot answers once. This agent can decide to search. It can decide to search again. It can also adjust its query after seeing weak results. That behavior creates real autonomy.
How to make it production ready. Keep improvements aligned with business risk.
- Add a critique node: a second model step that only looks for mistakes and missing evidence.
- Add a human approval edge: pause before any action that publishes externally.
- Add recursion limits: stop loops that run too long, since LangGraph supports controls like recursion limit settings to prevent runaway behavior.
- Add observability: store traces so you can inspect decisions and tool calls.
A practical launch plan. Start with internal users. Measure time saved. Track mistake types. Then expand scope only when metrics improve.
Final Checklist: From Idea to Working Agentic AI

Use this checklist to move from concept to a working agent without losing control. Treat it as the minimum bar for how to build agentic ai.
- Agent charter written: goal, users, inputs, outputs, autonomy, stop rules.
- Success metric defined: time saved, error rate, or resolution speed.
- Autonomy level chosen: suggest mode first for risky domains.
- LLM selected: stable instruction following and tool calling support.
- Framework fit checked: simple orchestration now, expandable later.
- Behavior rules documented: ask, act, retry, stop rules written clearly.
- Tool list minimal: only tools needed for the first job.
- Tool guardrails added: allow lists, validation, and least privilege access.
- State design done: what the agent tracks during the run.
- Memory decision made: added only if the use case needs it.
- Loop controls added: step limits, cost limits, and timeouts.
- Test set created: real examples, anonymized, with expected outcomes.
- Tracing enabled: capture tool calls, decisions, and outputs.
- Fallback path ready: route to a human when uncertain.
- Rollout staged: internal pilot, then limited production, then wider use.
Agentic AI rewards focus. When you treat the agent as a product with a clear job, a safe tool set, and measurable controls, you reduce risk and speed up learning. That is the core of how to build agentic ai in the real world.
Start with one use case this week. Write the charter first. Then build a minimal loop you can inspect. After that, expand only when you can explain every action the agent takes and every tool it touches.
Conclusion
Building agentic AI works best when you treat it like a product. You define one job. You set clear boundaries. Then you add tools, memory, and autonomy only when they earn their place. If you follow that flow, you move from demos to outcomes. That is the practical answer to how to build agentic ai without getting trapped in complexity.
At Designveloper, we help teams turn this flow into a working system. We started in 2013, and we now bring a delivery team of more than 90 people across engineering, UI UX, QA, and product. So we can support you from agent charter to production rollout. We design safe tool boundaries. We add human approval where risk is real. Then we ship, measure, and iterate.
When you want an agent that connects to real systems, we can build it with you through our AI development services. We also bring proven delivery from products we built across domains, including Lumin, Swell and Switchboard, Walrus Education, Joyn’it, Bonux, and ODC. That experience matters because agentic AI needs both strong software engineering and strict control. We bring both.
If you want to move from idea to a working agent, we can start with a focused pilot. We will help you choose the right autonomy level. We will validate value fast. Then we will scale only what stays predictable and safe.
Also published on

Share post on


Related Articles
AI Chatbot Development: A Step-By-Step Guide
AI Chatbot Development: A Step-By-Step Guide Published July 15, 2026
Claude Vs ChatGPT Vs Gemini For Coding: Which AI Fits Your Workflow?
Claude Vs ChatGPT Vs Gemini For Coding: Which AI Fits Your Workflow? Published July 06, 2026
12 vLLM Alternatives for Efficient and Scalable LLM Inference
12 vLLM Alternatives for Efficient and Scalable LLM Inference Published July 06, 2026